Giving Manny some Unreal Tress(es) (TressFX Real-Time Hair)

NOTE: This tutorial was written for TressFX 4.22, which has since been updated by AMD. The newer version is not the same as the version I am using, code-wise nor feature-wise.
In this quick tutorial, I'm going to walk through creating a fork of Unreal Engine 4, and using the 4.22 branch, clone 4.22 to my local machine, and add the TressFX 4.1 for Unreal Engine 4.22.3 patch. After making sure the engine compiles, I'll create some hair for the main mannequin (I'm calling it Manny) and import that hair, then attaching it via the TressFX components.
To do this yourself, you will need to compile the Unreal engine. That also means you need to sign the Epic Unreal Engine EULA so you can get access to their private GitHub site. My fork of their engine, plus the TressFX 4.1 Unreal Engine 4.22 engine 'patch' are both also resident on Unreal's GitHub repository, so joining Epic's developer community is a requirement.
You will also need Visual Studio 2017 (Community is fine) to compile (or an equivalent). I am using Visual Studio 2017. And you will need Git (I used Git for Windows, which includes Git Bash, and I have Tortoise Git so I can easily Add from the File Browser.)
I'm doing all this on Windows. As far as I know, TressFX/Unreal Engine is purely Windows based (not Linux) but it is an integration with Unreal, so I'm not sure. If you want to investigate TressFX on Vulkan, then you need to check out the GPUOpen TressFX/Cauldron implementation, which implements TressFX as a library interfacing with the Cauldron 'bare bones' engine framework - but compatible with both DirectX and Vulkan.
My machine is wimpy, I admit that freely! So I'm not going to try to overload it with hair simulation. Still, for an Intel i7 with 8GB, and a Nvidia GeForce GT 635, the fact that I'm seeing great performance with hair is awesome indeed! It proves that even on low end game machines, you can add hair - if you do it judiciously and with a plan in mind!
Big question, will TressFX work on mobile? (Which also means, performance limitations aside, 'when you integrate with Unreal, does that mean you are platform independent or not?')
Good question: one I intend to explore in later blogposts. But don't get your hopes up, even for higher end tablets, it's pretty gpu intensive.
https://desktop.github.com/
Getting access to Unreal Source code:
https://www.unrealengine.com/en-US/ue4-on-github
GPUOpen Fork of Unreal Engine (to get TressFX 4.22 patch, docs, exporter):
https://github.com/GPUOpenSoftware/UnrealEngine/tree/TressFX-4.22
Documentation and Exporter also available from the GPUOpen (non-Unreal) TressFX 4.1 branch:
https://github.com/GPUOpen-Effects/TressFX
*Documentation locations in Developer Guide may not exactly match actual GPUOpen Unreal branch or GPUOpen Cauldron. GitHub paths may have changed post-documentation finalization.
Second, create a fork of Unreal Engine, so you have it as your own repository. I'm going to walk you through the process I followed, which requires a fork and clone of the main Unreal Engine, and then requires you to download the TressFX 'branch' from the GPUOpen fork into your locally cloned Unreal Engine.
You can't fork a fork on GitHub. So you need to download either one or the other. This is the way the GPUOpen fork was set up. Since it's a fork of the main engine, you can't just fork it and get everything. (At least I couldn't!) If you try to fork, it will fork the master (the main Unreal Engine instead).
There may be easier ways to do this, but I decided to just brute force my way through.
You can also just download a copy of my fork, since I've uploaded (pushed) the TressFX patch (and tools and documentation) to my repository. Again, you can't fork mine, because it's already a fork, but if you don't care about having a repository on GitHub, you can just make a local copy using Download.
My fork location: https://github.com/CGAnderson/UE4_22TressFX4_1/tree/4.22
Note: I may have uploaded the TressFX patch changes to my 4.22 branch copy on my fork, but that does NOT mean I intend to do a Pull Request (PR) back to Epic Unreal Engine. So, I'm not impacting the currently accepted 4.22 branch of the engine. Only my fork has those changes, and can't be forked (because of the GitHub fork of a fork rule).
Remember, to observe the EULA from Epic. You can only see the source if you join their developer network, and you can only use Epic stuff (including assets) for Epic Unreal Engine applications.
As for the assets I am creating, you may use them for NON-COMMERCIAL purposes only. Some assets will only work with Unreal. Others, like the TFX files, can work with either implementation of TressFX (Unreal or Cauldron) but the mannequin used (Manny) belongs to Epic Unreal, so there isn't much point in trying to use them outside of this tutorial.
Besides, they are very basic hair assets. You really don't want to use them for anything other than this tutorial. For commercial work, you would want something more elaborate.

This creates a clone of the 4.22 branch, and only that branch, locally on your machine.
The following is from the Unreal Readme.md on GitHub: I recommend you follow the directions and actually build the engine to make sure everything works OK before applying the TressFX engine patch.
Windows
In my case, my machine is pretty wimpy compared to newer desktop workstations, so while the Setup only took an hour or so, compiling the engine took all night. So depending on your machine, it may only take an hour, or it may take a lot longer. Don't fret about it. It's a big engine. Just let Visual Studio do its job.
If something goes wrong the first time, again, just try to build it again. I've found that with Unreal Engine, there are so many interrelated dependencies, that sometimes you need to build multiple times. The same goes for starting up the Editor. Don't assume a failure the first time is a true failure. Just try again to see if it works.
I tried installing the engine both ways, as a fork/clone and as a download. Both times, everything went fine, though I had to start the editor twice to get it to load. I think that was because my machine isn't that powerful, so it choked the first time.
So go to the GPUOpen fork and choose the branch for TressFX 4.1.
https://github.com/GPUOpenSoftware/UnrealEngine/tree/TressFX-4.22
Download the branch as a ZIP file and extract it into a folder in your Unreal Engine top level directory. My 4.22 branch does exactly this. I called my folder TressFXpatchinfo\ and it contains the actual patch, as well as the Maya Exporter and the Documentation. Both of which are very important. It also contains a Readme.md file that details how to apply the patch.
Before you continue, stop and copy the main readme.md file in your local Unreal Engine, name it something like Readme_orig.md. The patch process will overwrite this file with the patch version, which I don't like since you lose some good installation information in the process.
Go back to your Git Bash window now:

Make sure you are in your UnrealEngine repo (mine is called UnrealEngine (4.22)). And type:
Git should now run through the patch information and modify/add/delete according to the patch.
This is why I used Git Bash. I prefer using a GUI, even for Git, but Git Bash is the easiest way to apply a patch. No fuss.
If it worked, the first thing to check is the Readme. Did it change? If it did, rename it to Readme_TressFX.md and rename your Readme_orig.md back to Readme.md. Now, you haven't lost your original 'how to build Unreal Engine' information, and also have information for applying the patch - which you've already done - and more general information about TressFX in that second Readme.
Finally, the engine should have built. And you can start up the UE4Editor again, like before. This time create a new project. Make sure the project opens, then save and close it.
NOTE: if you just cloned my Github fork to get TressFX already integrated with the engine source, be sure to run the Setup.bat steps to get the full engine. AND check to make sure that those steps did not wipe out any TressFX file modifications. As I said, I did the fork/clone, Setup.bat, THEN the TressFX patch. It required two compilations of the engine (before and after) to make sure everything was working, but I saw it as a safer path.
Note: this step is sometimes forgotten. I note it in the Developer Guide, but I'm not sure if it was noted in the Quickstart, which another team member wrote. It's an easy step to overlook.
Go to your project's directory, and with a text editor, open the UPROJECT, and add a modules section with the TressFX editor module (or add TressFX editor module to the modules list, if there is already a Modules section.)

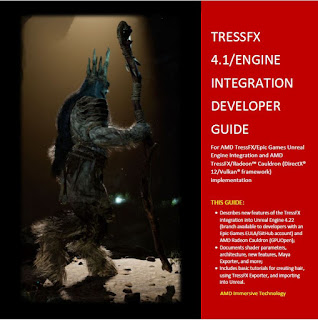
It's a great reference, if I do say so myself (yes, I wrote most of it, but it's still a great guide to TressFX 4.1) and includes in-depth information on all the Unreal components, the TressFX architecture (including arch write-ups for the new Unreal and Cauldron bits, supplied by my awesome colleagues responsible for those areas), as well as tutorials that cover everything from creating the hair in Maya, to exporting it (using the Exporter), then importing and attaching it to Unreal skeletal meshes.
Aside: The cover is from the Old King demo, which some folks got to see at GDC 2019 (NDA at the time). Old King demo should be released soon, that was the plan, last I knew. He has a lot of hair and stresses even a Threadripper/Vega system, but that was his job, of course. You can see the shadows, backlighting, etc in the image on the cover. He was using UV mapping for hair color, but not any of the 'down the strand' features. I'll cover those in a later blogpost.
So I'm not going to go into a rehash of how exactly I made hair in Maya, then used the Exporter settings, then imported it into Unreal.
Why not?
Well....This blog post is already pretty long, that is why. If you have questions, ask them in Comments and I'll try to answer as best I can.
Instead, I'll just go over the highlights and point you to the tutorials in the back of the Dev Guide.
The tutorials are at the back, and the middle three detail going from Maya export, to import and creation of TressFXComponents to adding them to a blueprint for use.

As a test, I exported the standard Unreal mannequin (Manny) out of Unreal as an FBX and imported it into Maya. I then created a skin cluster on Manny's head and used Maya XGen to generate some hair, which I turned into splines. I exported that hair, using default values, then imported it into Unreal Editor, using the Manny skeleton.
I created a TressFX Component and attached it to the 3rd person player Skeletal Mesh. So the Skeletal Mesh, was the parent of the TressFXComponent. Then I set the hair as the Hair Asset on the Component, essentially attaching the hair.

It worked. Sort of. As you can see from the picture, something went wrong. In Bind Pose, the hair looked fine, but when Manny wasn't in bind pose, the hair split into two sections. And when Manny moved, the hair stayed separated but bounced around. It was tracking to Manny, but broken up. This is a major clue that the wrong bones are controlling the hair.
So I went back into Maya, and instead of using the defaults, which lets the exporter choose the bones that are nearest to the hair, I set a default root bone and constrained the bone choices to a subset of bones. In fact, I set the root to be the one bone in the head area, and also set that as the only choice in the subset.

These abilities are features that I added to the Exporter for the TressFX 4.1 release. We found, during development and testing, that sometimes the wrong bones would be added to the 'four influencers' list that is used per hair strand. This usually happens because of many facial bones that are 'dead' - they aren't being used in the main skeletal setup, but they still show up as valid bones in the skeleton. It can also happen because some of the barycentric coordinate math creates a dead weight.
So I added the ability to set a custom root bone (a bone that is used when no bones are found), and the ability to limit choices to a subset of the bones. The second hair set I generated for Manny used that single bone. Since Manny doesn't have any facial muscles, and the hair is purely on his head, it won't matter if only one bone is the sole source influencer for tracking.
The result was as expected. Manny now had proper hair that tracked correctly when he moved.

In the next blog post, I'll experiment a bit with the other features of TressFX 4.1 in Unreal, namely using the Simulation and Render materials (and their shader parameters), adding Collision for the hair (and when you don't need to add Collision -- to save yourself some system load), as well as new features we added for creating effects 'down the strand itself'.
The two hair sets for Manny (the error-version and the correct version) are up on my 4.22 branch in the HairFiles directory.
My opinions are my own, and no one else's. Anything I talk about is either my own opinion and/or research, or public knowledge. As for copyright, all copyright is reserved unless explicitly noted, this includes my work or any references I make to papers, websites, libraries, engines or similar, which belongs to the original copyright/license holder. Always remember to cite your references, and observe copyright and licensing when using or referencing any code or words or images or anything that isn't your original work. 'Nuff said, I hope. Let's get coding!
To do this yourself, you will need to compile the Unreal engine. That also means you need to sign the Epic Unreal Engine EULA so you can get access to their private GitHub site. My fork of their engine, plus the TressFX 4.1 Unreal Engine 4.22 engine 'patch' are both also resident on Unreal's GitHub repository, so joining Epic's developer community is a requirement.
You will also need Visual Studio 2017 (Community is fine) to compile (or an equivalent). I am using Visual Studio 2017. And you will need Git (I used Git for Windows, which includes Git Bash, and I have Tortoise Git so I can easily Add from the File Browser.)
I'm doing all this on Windows. As far as I know, TressFX/Unreal Engine is purely Windows based (not Linux) but it is an integration with Unreal, so I'm not sure. If you want to investigate TressFX on Vulkan, then you need to check out the GPUOpen TressFX/Cauldron implementation, which implements TressFX as a library interfacing with the Cauldron 'bare bones' engine framework - but compatible with both DirectX and Vulkan.
My machine is wimpy, I admit that freely! So I'm not going to try to overload it with hair simulation. Still, for an Intel i7 with 8GB, and a Nvidia GeForce GT 635, the fact that I'm seeing great performance with hair is awesome indeed! It proves that even on low end game machines, you can add hair - if you do it judiciously and with a plan in mind!
Big question, will TressFX work on mobile? (Which also means, performance limitations aside, 'when you integrate with Unreal, does that mean you are platform independent or not?')
Good question: one I intend to explore in later blogposts. But don't get your hopes up, even for higher end tablets, it's pretty gpu intensive.
Here are some links you'll need:
Git:https://desktop.github.com/
Getting access to Unreal Source code:
https://www.unrealengine.com/en-US/ue4-on-github
GPUOpen Fork of Unreal Engine (to get TressFX 4.22 patch, docs, exporter):
https://github.com/GPUOpenSoftware/UnrealEngine/tree/TressFX-4.22
Documentation and Exporter also available from the GPUOpen (non-Unreal) TressFX 4.1 branch:
https://github.com/GPUOpen-Effects/TressFX
*Documentation locations in Developer Guide may not exactly match actual GPUOpen Unreal branch or GPUOpen Cauldron. GitHub paths may have changed post-documentation finalization.
Git and Unreal Membership:
First, get Git installed, and get access to the Unreal source code.Second, create a fork of Unreal Engine, so you have it as your own repository. I'm going to walk you through the process I followed, which requires a fork and clone of the main Unreal Engine, and then requires you to download the TressFX 'branch' from the GPUOpen fork into your locally cloned Unreal Engine.
You can't fork a fork on GitHub. So you need to download either one or the other. This is the way the GPUOpen fork was set up. Since it's a fork of the main engine, you can't just fork it and get everything. (At least I couldn't!) If you try to fork, it will fork the master (the main Unreal Engine instead).
There may be easier ways to do this, but I decided to just brute force my way through.
You can also just download a copy of my fork, since I've uploaded (pushed) the TressFX patch (and tools and documentation) to my repository. Again, you can't fork mine, because it's already a fork, but if you don't care about having a repository on GitHub, you can just make a local copy using Download.
My fork location: https://github.com/CGAnderson/UE4_22TressFX4_1/tree/4.22
Note: I may have uploaded the TressFX patch changes to my 4.22 branch copy on my fork, but that does NOT mean I intend to do a Pull Request (PR) back to Epic Unreal Engine. So, I'm not impacting the currently accepted 4.22 branch of the engine. Only my fork has those changes, and can't be forked (because of the GitHub fork of a fork rule).
Remember, to observe the EULA from Epic. You can only see the source if you join their developer network, and you can only use Epic stuff (including assets) for Epic Unreal Engine applications.
As for the assets I am creating, you may use them for NON-COMMERCIAL purposes only. Some assets will only work with Unreal. Others, like the TFX files, can work with either implementation of TressFX (Unreal or Cauldron) but the mannequin used (Manny) belongs to Epic Unreal, so there isn't much point in trying to use them outside of this tutorial.
Besides, they are very basic hair assets. You really don't want to use them for anything other than this tutorial. For commercial work, you would want something more elaborate.
Fork/Clone or Download the Unreal Engine 4.22 Branch:
Third, you've created a fork of Unreal Engine and cloned it to your local machine, OR you've downloaded the engine (the original or my 4.22 branch of it). Now you are ready to setup the rest of the engine and compile it. I recommend compiling the engine BEFORE you apply the TressFX patch, to make sure everything is working properly. Then, you know if anything goes wrong with compilation AFTER applying the patch, that it was the patch itself and not something wrong with your environment.
Using Download Option:
- Change to the 4.22 branch, then just hit the download/clone button and choose Download Zip to get a .zip file. Unzip it in the location you want the source.
Using Fork/Clone Option (not Download option):
- Change to the 4.22 branch, hit the download/clone button and copy the URL. (I'm using the HTTP method.)
- Open up Git Bash.

- Change to the directory you want to keep your Git repository. For example, on my K:\ drive. I did 'cd K:\GitRepos'
- In my case, I wanted to only clone the actual branch I was going to use (4.22). So it took a few tries to figure out the documentation and get the order of the options correct.
git clone (https link you copied) --branch 4.22 --single-branch
This creates a clone of the 4.22 branch, and only that branch, locally on your machine.
Building the Unreal Engine (without TressFX Patch):
Now, you have the branch local. You still need to follow the Unreal directions to get the whole engine loaded (downloaded and configured).The following is from the Unreal Readme.md on GitHub: I recommend you follow the directions and actually build the engine to make sure everything works OK before applying the TressFX engine patch.
Windows
- Install GitHub for Windows then fork and clone our repository. To use Git from the command line, see the Setting up Git and Fork a Repo articles.If you'd prefer not to use Git, you can get the source with the 'Download ZIP' button on the right. The built-in Windows zip utility will mark the contents of zip files downloaded from the Internet as unsafe to execute, so right-click the zip file and select 'Properties...' and 'Unblock' before decompressing it. Third-party zip utilities don't normally do this.
- Install Visual Studio 2017. All desktop editions of Visual Studio 2017 can build UE4, including Visual Studio Community 2017, which is free for small teams and individual developers. To install the correct components for UE4 development, check the "Game Development with C++" workload, and the "Unreal Engine Installer" and "Nuget Package Manager" optional components.
- Open your source folder in Explorer and run Setup.bat. This will download binary content for the engine, as well as installing prerequisites and setting up Unreal file associations. On Windows 8, a warning from SmartScreen may appear. Click "More info", then "Run anyway" to continue.A clean download of the engine binaries is currently 3-4gb, which may take some time to complete. Subsequent checkouts only require incremental downloads and will be much quicker.
- Run GenerateProjectFiles.bat to create project files for the engine. It should take less than a minute to complete.
- Load the project into Visual Studio by double-clicking on the UE4.sln file. Set your solution configuration to Development Editor and your solution platform to Win64, then right click on the UE4 target and select Build. It may take anywhere between 10 and 40 minutes to finish compiling, depending on your system specs.
- After compiling finishes, you can load the editor from Visual Studio by setting your startup project to UE4 and pressing F5 to debug.
Why is this taking SOOOO LONG??
In my case, my machine is pretty wimpy compared to newer desktop workstations, so while the Setup only took an hour or so, compiling the engine took all night. So depending on your machine, it may only take an hour, or it may take a lot longer. Don't fret about it. It's a big engine. Just let Visual Studio do its job.If something goes wrong the first time, again, just try to build it again. I've found that with Unreal Engine, there are so many interrelated dependencies, that sometimes you need to build multiple times. The same goes for starting up the Editor. Don't assume a failure the first time is a true failure. Just try again to see if it works.
I tried installing the engine both ways, as a fork/clone and as a download. Both times, everything went fine, though I had to start the editor twice to get it to load. I think that was because my machine isn't that powerful, so it choked the first time.
Applying the TressFX 4.1 Unreal Engine 4.22 Patch:
OK. If all that went well, it's time to get the patch. If you've never done a patch before, it can feel a bit tricky. It was my first experience with patching as well, and it's why I recommend doing a fork and clone from Unreal Engine source, and then DOWNLOADING as a zip, the actual patch and related files.So go to the GPUOpen fork and choose the branch for TressFX 4.1.
https://github.com/GPUOpenSoftware/UnrealEngine/tree/TressFX-4.22
Download the branch as a ZIP file and extract it into a folder in your Unreal Engine top level directory. My 4.22 branch does exactly this. I called my folder TressFXpatchinfo\ and it contains the actual patch, as well as the Maya Exporter and the Documentation. Both of which are very important. It also contains a Readme.md file that details how to apply the patch.
Before you continue, stop and copy the main readme.md file in your local Unreal Engine, name it something like Readme_orig.md. The patch process will overwrite this file with the patch version, which I don't like since you lose some good installation information in the process.
Go back to your Git Bash window now:
Make sure you are in your UnrealEngine repo (mine is called UnrealEngine (4.22)). And type:
git am < local path from current location to the actual .patch file
Git should now run through the patch information and modify/add/delete according to the patch.
This is why I used Git Bash. I prefer using a GUI, even for Git, but Git Bash is the easiest way to apply a patch. No fuss.
If it worked, the first thing to check is the Readme. Did it change? If it did, rename it to Readme_TressFX.md and rename your Readme_orig.md back to Readme.md. Now, you haven't lost your original 'how to build Unreal Engine' information, and also have information for applying the patch - which you've already done - and more general information about TressFX in that second Readme.
Build the Engine (Again) With the TressFX Patch:
That was already a lot to do. You've compiled the engine (without the patch) to make sure it worked ok, and then applied the patch. You now need to compile the engine again to take in the changes from the patch. Go ahead and do that. Doing a 'Build UE4', like you did before, should be enough. Still, on my machine, I went off and did something else since again, it took all night.Finally, the engine should have built. And you can start up the UE4Editor again, like before. This time create a new project. Make sure the project opens, then save and close it.
NOTE: if you just cloned my Github fork to get TressFX already integrated with the engine source, be sure to run the Setup.bat steps to get the full engine. AND check to make sure that those steps did not wipe out any TressFX file modifications. As I said, I did the fork/clone, Setup.bat, THEN the TressFX patch. It required two compilations of the engine (before and after) to make sure everything was working, but I saw it as a safer path.
Modifying the UPROJECT to load the TressFX Editor:
Why? Well, to actually import and create TressFX components, we need the Editor module of TressFX. This module is not part of the runtime, since an application wouldn't need editor stuff, and therefore, we need to tell the uproject itself to load the Editor module.Note: this step is sometimes forgotten. I note it in the Developer Guide, but I'm not sure if it was noted in the Quickstart, which another team member wrote. It's an easy step to overlook.
Go to your project's directory, and with a text editor, open the UPROJECT, and add a modules section with the TressFX editor module (or add TressFX editor module to the modules list, if there is already a Modules section.)


Use the Documentation:
All of this information I'm covering now is discussed in more detail in the TressFX 4.1 Developers Guide. It's a large PDF included in the zip file. It's not part of the actual patch, but like the Exporter tool (Maya plugin), it's contained in a separate directory.It's a great reference, if I do say so myself (yes, I wrote most of it, but it's still a great guide to TressFX 4.1) and includes in-depth information on all the Unreal components, the TressFX architecture (including arch write-ups for the new Unreal and Cauldron bits, supplied by my awesome colleagues responsible for those areas), as well as tutorials that cover everything from creating the hair in Maya, to exporting it (using the Exporter), then importing and attaching it to Unreal skeletal meshes.
Aside: The cover is from the Old King demo, which some folks got to see at GDC 2019 (NDA at the time). Old King demo should be released soon, that was the plan, last I knew. He has a lot of hair and stresses even a Threadripper/Vega system, but that was his job, of course. You can see the shadows, backlighting, etc in the image on the cover. He was using UV mapping for hair color, but not any of the 'down the strand' features. I'll cover those in a later blogpost.
So I'm not going to go into a rehash of how exactly I made hair in Maya, then used the Exporter settings, then imported it into Unreal.
Why not?
Well....This blog post is already pretty long, that is why. If you have questions, ask them in Comments and I'll try to answer as best I can.
Instead, I'll just go over the highlights and point you to the tutorials in the back of the Dev Guide.
The tutorials are at the back, and the middle three detail going from Maya export, to import and creation of TressFXComponents to adding them to a blueprint for use.

Give Manny Some Hair!
For now, you need Maya to create the splines that will be exported as hair. Currently the only Exporter for exporting splines into TressFX hair files is written in Maya. But you can use that plugin as a guide if you want to write an exporter for other DCC tools. The exporter's main function is to take a set of splines (nurbs curves) and turn them into hair curve information. This information is tied to a particular skeletal, which must be (in Maya) tied to a mesh. In other words, a skinned mesh. The bone information is what is used to fix the hair root positions, and the bone names are used on import to match up to the skeletal mesh on the Unreal (or Cauldron) side.As a test, I exported the standard Unreal mannequin (Manny) out of Unreal as an FBX and imported it into Maya. I then created a skin cluster on Manny's head and used Maya XGen to generate some hair, which I turned into splines. I exported that hair, using default values, then imported it into Unreal Editor, using the Manny skeleton.
I created a TressFX Component and attached it to the 3rd person player Skeletal Mesh. So the Skeletal Mesh, was the parent of the TressFXComponent. Then I set the hair as the Hair Asset on the Component, essentially attaching the hair.

It worked. Sort of. As you can see from the picture, something went wrong. In Bind Pose, the hair looked fine, but when Manny wasn't in bind pose, the hair split into two sections. And when Manny moved, the hair stayed separated but bounced around. It was tracking to Manny, but broken up. This is a major clue that the wrong bones are controlling the hair.
So I went back into Maya, and instead of using the defaults, which lets the exporter choose the bones that are nearest to the hair, I set a default root bone and constrained the bone choices to a subset of bones. In fact, I set the root to be the one bone in the head area, and also set that as the only choice in the subset.

These abilities are features that I added to the Exporter for the TressFX 4.1 release. We found, during development and testing, that sometimes the wrong bones would be added to the 'four influencers' list that is used per hair strand. This usually happens because of many facial bones that are 'dead' - they aren't being used in the main skeletal setup, but they still show up as valid bones in the skeleton. It can also happen because some of the barycentric coordinate math creates a dead weight.
So I added the ability to set a custom root bone (a bone that is used when no bones are found), and the ability to limit choices to a subset of the bones. The second hair set I generated for Manny used that single bone. Since Manny doesn't have any facial muscles, and the hair is purely on his head, it won't matter if only one bone is the sole source influencer for tracking.
The result was as expected. Manny now had proper hair that tracked correctly when he moved.

In the next blog post, I'll experiment a bit with the other features of TressFX 4.1 in Unreal, namely using the Simulation and Render materials (and their shader parameters), adding Collision for the hair (and when you don't need to add Collision -- to save yourself some system load), as well as new features we added for creating effects 'down the strand itself'.
The two hair sets for Manny (the error-version and the correct version) are up on my 4.22 branch in the HairFiles directory.
My opinions are my own, and no one else's. Anything I talk about is either my own opinion and/or research, or public knowledge. As for copyright, all copyright is reserved unless explicitly noted, this includes my work or any references I make to papers, websites, libraries, engines or similar, which belongs to the original copyright/license holder. Always remember to cite your references, and observe copyright and licensing when using or referencing any code or words or images or anything that isn't your original work. 'Nuff said, I hope. Let's get coding!


Comments
Post a Comment